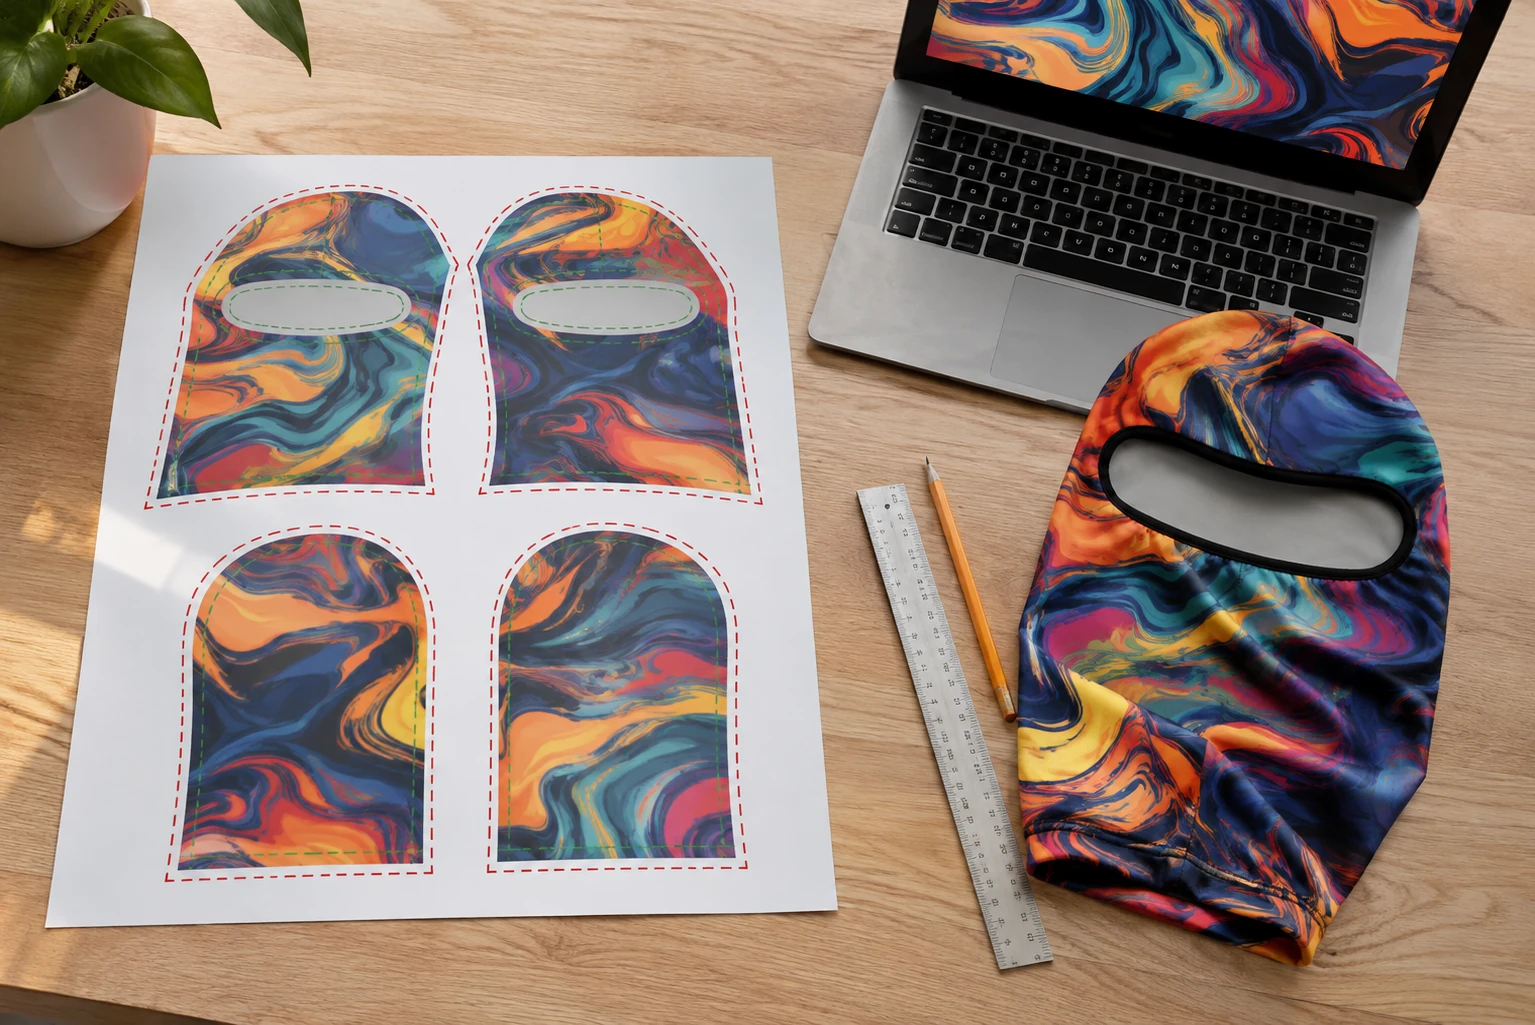
A balaclava is a rounded, stretchy shape, but its print is designed flat. Before a ski mask is sewn, its design is laid out on separate panels, each with its own seams, openings and stretch. A template shows you those panels at full size, so a design that looks good on screen also looks right on a head. This guide explains how to use one when you order custom sublimated balaclavas from Mr Balaclava.
It is written for designers, brands, merch teams and event organisers preparing an all-over print. We print and sew in-house in Sialkot, Pakistan, and the values below are the ones our team usually plans with. Our guide on how sublimated balaclavas are made explains the process the template feeds into; every order is confirmed with a free digital mockup before anything is printed.
What is a balaclava print template?
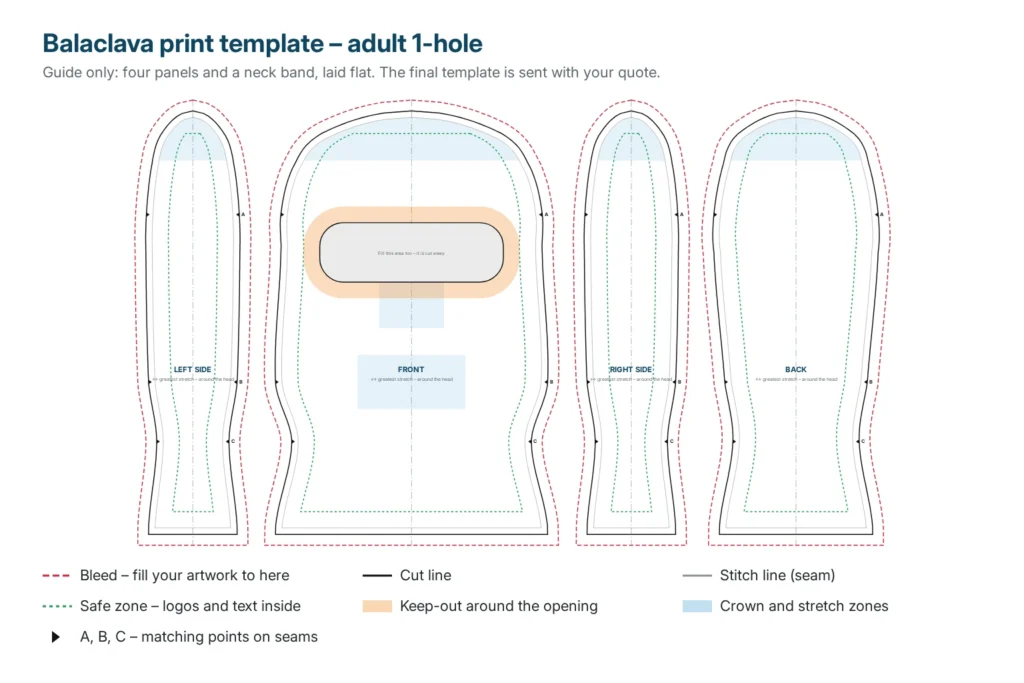
A balaclava print template is a flat, full-size drawing of every panel of the balaclava, with the bleed, cut line, stitch line, safe zones and openings marked. You place your artwork on it, and our team uses the same layout to print the panels.
Templates for T-shirts and face masks are easy to find, but a balaclava has more to plan for: a crown where several panels meet, eye and mouth openings with a binding, seams down both sides and fabric that stretches around the head. That is why a balaclava template needs its own keep-out zones, not only a bleed.
Which panels does a sublimated balaclava have?
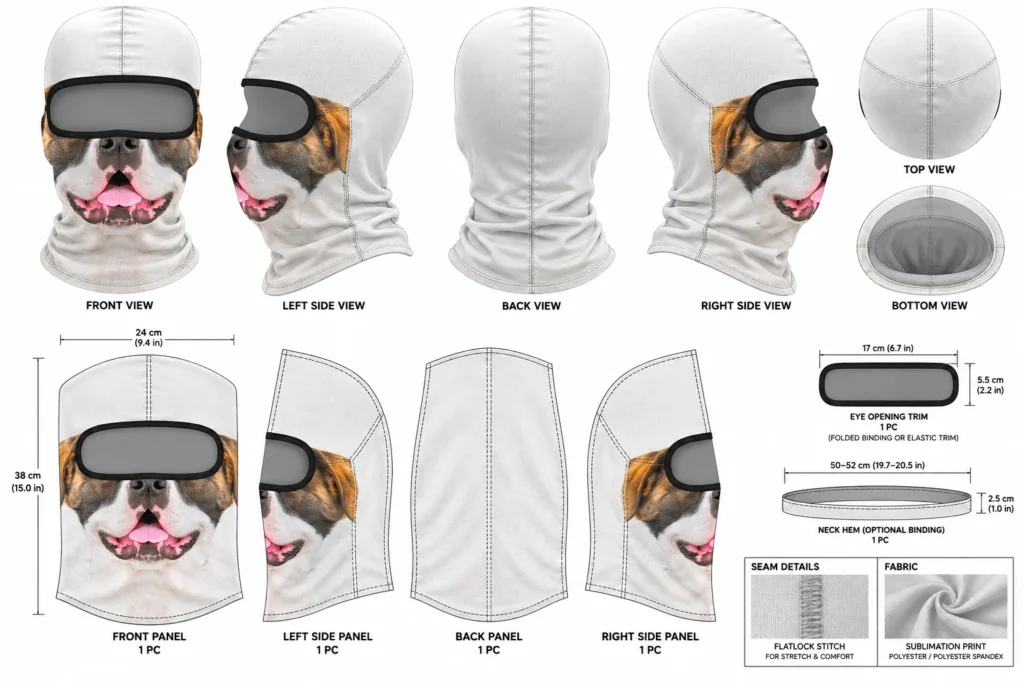
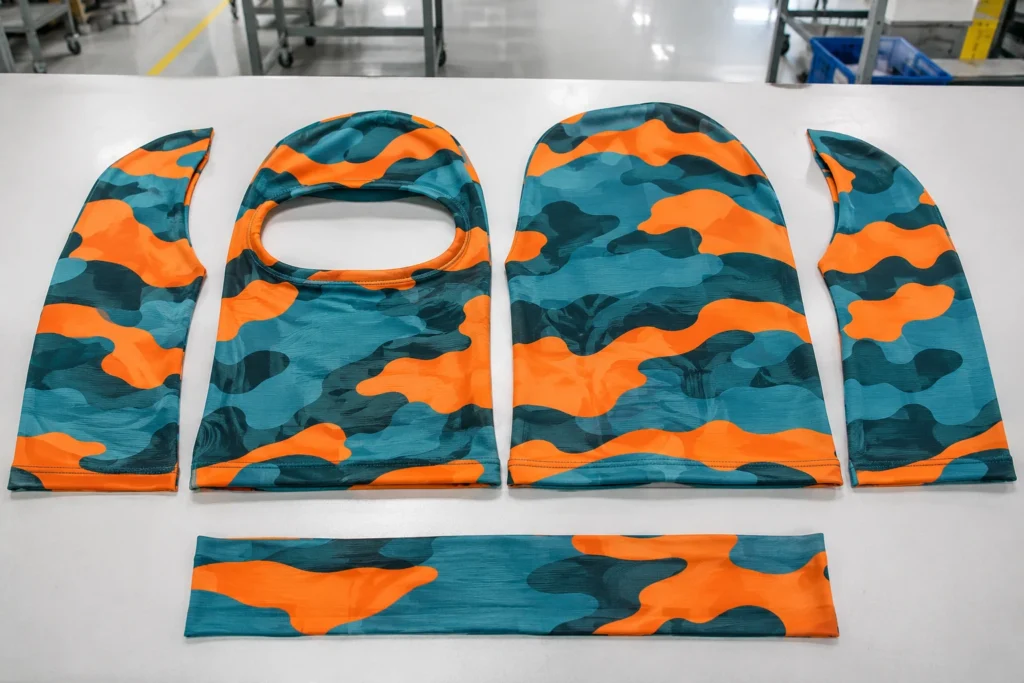
Our sublimated balaclavas are usually sewn from four panels (a front, two sides and a back) that meet at the crown, plus a neck band and the binding around the openings. The front panel carries the face and the openings, so it holds most of the design.
| Piece | Adult, finished (usually) | Kids, finished (usually) | What it carries |
|---|---|---|---|
| Front panel | 240 mm at its widest × 380 mm, crown to hem | 210 × 330 mm | The face, the openings, most of the design |
| Side panels (×2) | 75 mm at their widest × 380 mm | 66 × 330 mm | The design as it wraps around the cheeks and ears |
| Back panel | 140 mm at its widest × 380 mm | 122 × 330 mm | The back of the head and neck |
| Neck band (optional) | 510 × 25 mm, folded double | 448 × 25 mm | Usually the background colour of the design, or plain |
| Opening binding | Folded binding or elastic trim | The same | Usually black or a colour from the design; not printed |
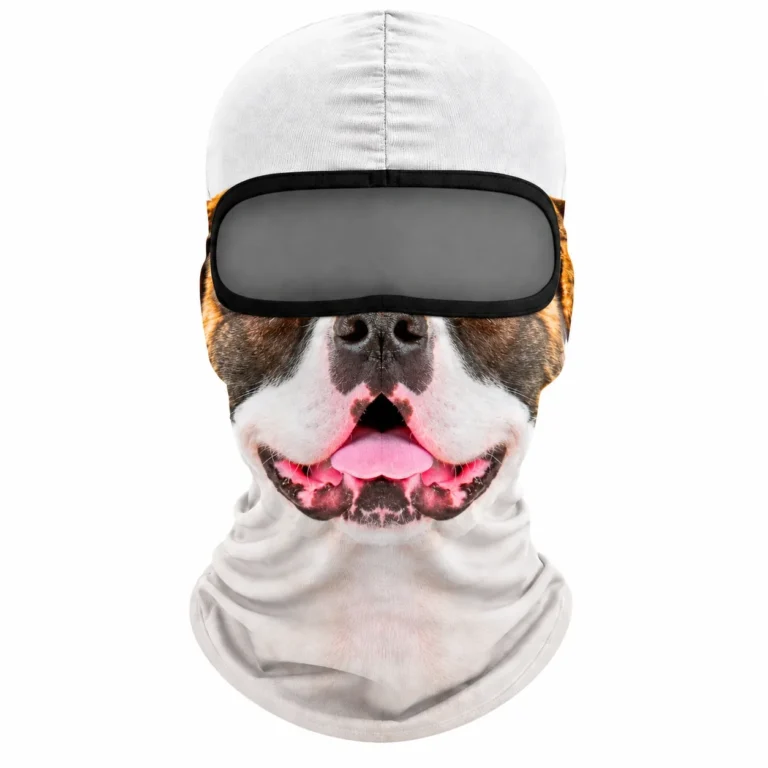
The adult size fits heads of about 54–61 cm, because the four-way stretch fabric is cut slightly smaller than the head; the kids size fits about 49–54 cm. On the 3D bulldog style in our catalogue, the front measures 24 cm across and 38 cm from crown to hem, the eye opening 17 × 5.5 cm, and the neck hem 50–52 cm around.
What size should balaclava artwork be?
Set up each panel at full size plus the seam allowance and the bleed: usually 16 mm beyond the finished edge on every side. For the adult front panel that is a 272 × 412 mm canvas, or 3,213 × 4,866 pixels at 300 dpi.
| Panel | Adult canvas | Adult at 300 dpi | Kids canvas | Kids at 300 dpi |
|---|---|---|---|---|
| Front panel | 272 × 412 mm | 3,213 × 4,866 px | 242 × 362 mm | 2,858 × 4,276 px |
| Side panel (each) | 107 × 412 mm | 1,264 × 4,866 px | 98 × 362 mm | 1,157 × 4,276 px |
| Back panel | 172 × 412 mm | 2,031 × 4,866 px | 154 × 362 mm | 1,819 × 4,276 px |
| Neck band | 542 × 82 mm | 6,402 × 969 px | 480 × 82 mm | 5,669 × 969 px |
Pixel sizes matter only for raster artwork such as photos and painted textures. Vector artwork stays sharp at any size, so draw it at 1:1 in millimetres. If you design one continuous pattern, you can also send one large file, and our team can usually lay it out across the panels; tell us so when you send it.
What are the bleed, cut line, stitch line and safe zone?
The bleed is extra artwork beyond the cut line, the cut line is where the panel is cut, the stitch line is the seam, and the safe zone is the inner area where logos and text stay clear of seams and openings. On our template the usual values are 10 mm of bleed, 6 mm of seam allowance and a 15 mm safe zone.
- Bleed (usually 10 mm beyond the cut line): fill your design all the way to this line. Fabric moves slightly in printing and cutting, and bleed stops thin white edges appearing at the seams.
- Cut line: the outline of the panel as it is cut from the printed fabric.
- Stitch line (usually 6 mm inside the cut line): where the flat seam joins two panels; this is the finished edge you see.
- Safe zone (usually 15 mm inside the stitch line): keep logos, lettering and faces inside it, so seams do not cut through them.
- Crown zone (the top 40 mm of each panel): the panels meet here, so keep logos and text out of it.
- Matching notches A, B and C: marks on each seam that show where neighbouring panels meet, so a pattern can be lined up across the seam.
Our free bandana template works the same way, with a smaller bleed, because a bandana is cut from one flat square rather than sewn from shaped panels.
Where are the eye and mouth openings on the template?
The openings are cut out of the front panel and finished with a binding that covers a narrow edge. Keep important details about 15 mm away from each opening, but let the background fill the opening area too, because it is cut away.
| Style | Openings on our guide template (usually) | Position |
|---|---|---|
| 1-hole, adult | One wide eye opening, about 170 × 55 mm, rounded corners | Centred, about 125 mm below the crown |
| 2-hole, adult | Two eye openings, about 48 × 32 mm each, no mouth opening | About 72 mm apart centre to centre, 125 mm below the crown |
| 3-hole, adult | Two eye openings as the 2-hole, plus a mouth opening of about 55 × 30 mm | Mouth centred about 200 mm below the crown |
| 1-hole, kids | One wide eye opening, about 140 × 45 mm | Centred, about 110 mm below the crown |
| Mesh eye or mesh mouth | The same opening, with mesh sewn behind it | As the style |
| Closed printed face | No openings; eyes and mouth are printed only | — |
On our site a 2-hole balaclava has two eye openings and no mouth opening, but the term is used in different ways online. Our guide to balaclava face openings explains every style, and we always confirm the openings with a mockup rather than by name. A face design such as an animal muzzle or a printed smile should be placed in relation to these openings; our animal balaclava range shows how the eyes and nose of a printed face sit around a wide eye opening.
How does stretch change a balaclava design?
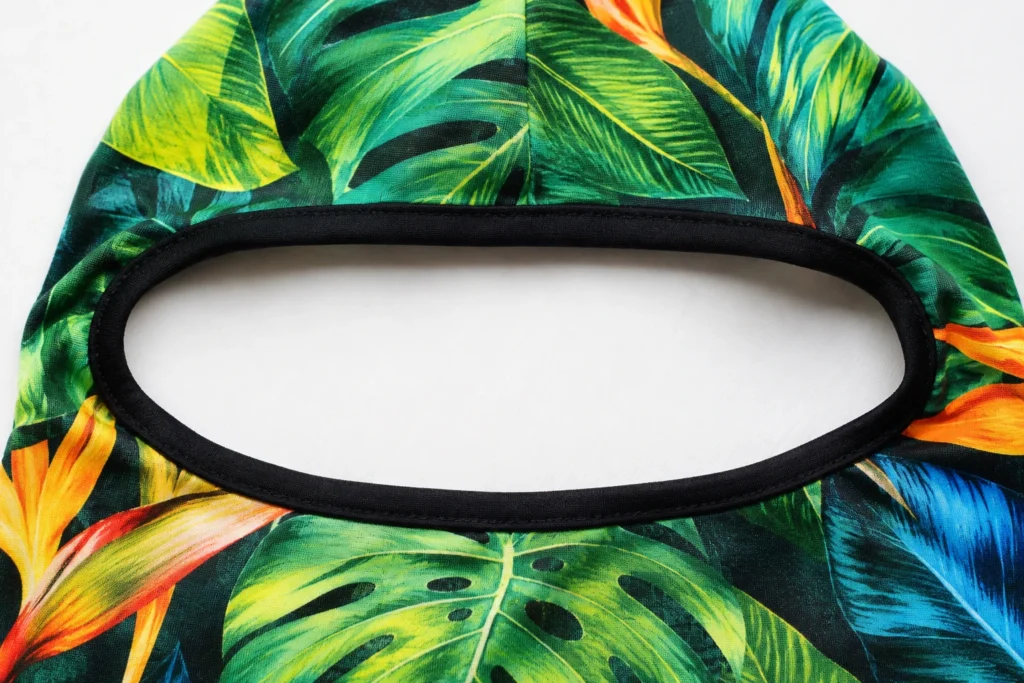
When the balaclava is worn, the fabric stretches around the head, mostly across the face and over the crown. A design drawn flat becomes slightly wider and lighter where it stretches, so round logos can look oval and faces can look broader.
- Greatest stretch runs around the head: logos and faces get wider more than they get taller, so a slightly narrow face drawing often looks more natural when worn.
- Nose bridge, chin and crown stretch most: colours there can look a little lighter, because the white base shows between the dyed fibres. Patterns and camo hide this better than large solid areas.
- Forehead and cheeks stretch less: they are the steadiest places for a logo or lettering.
Our guide to the process explains why this lighter tone happens. The sample is where you see stretch and colour on a real head, so we always recommend checking it worn, not only flat.
How should a design cross the seams?
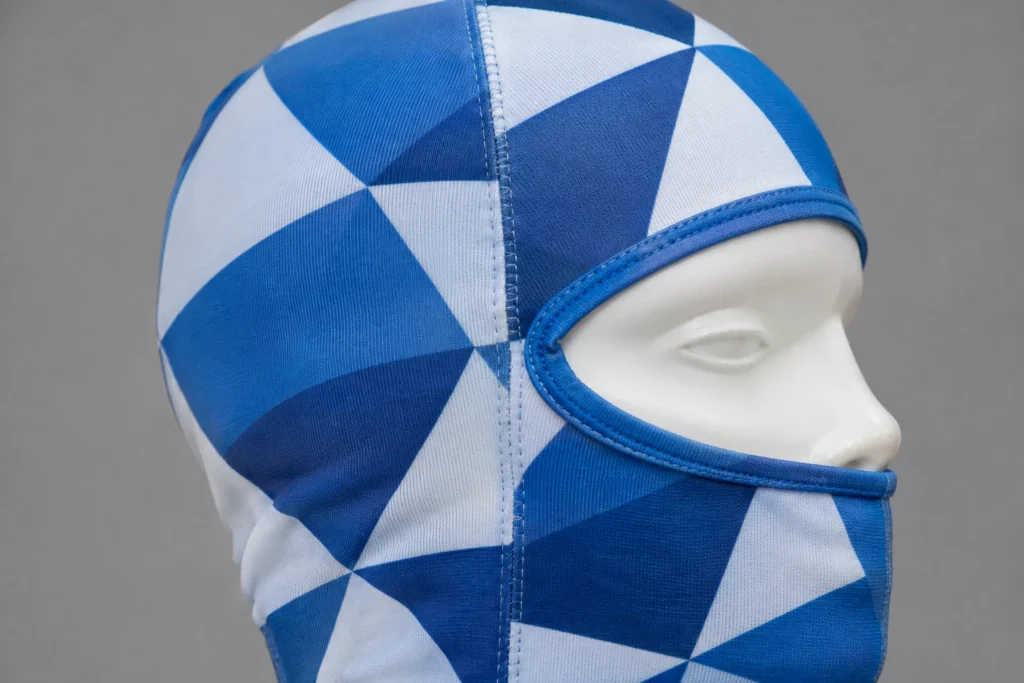
Let all-over patterns run continuously across all panels and line them up at the matching notches. Stretch fabric moves a little while it is sewn, so a design that crosses a seam can shift by a few millimetres; keep text and fine lines off the seams.
- Repeat patterns, camo and textures: the easiest designs for a balaclava, because small shifts at the seams are hard to see.
- A mirrored design: draw the left side panel and flip it for the right side, so both cheeks match.
- A face on the front: keep the eyes, nose and mouth inside the front panel’s safe zone; let fur, colour or texture continue onto the sides.
- A logo on the back or the neck band: place it in the middle of the back panel, inside the safe zone, or ask us about a woven label instead.
For pattern ideas that suit these panels, from camo to flags and festival prints, see our custom balaclava design ideas.
Which files and colour settings should you send?
Send vector files (AI, PDF or SVG) for logos and lettering, and raster files (TIFF, PNG or PSD) at 300 dpi at 1:1 for photos and painted designs. RGB or CMYK both work; add Pantone references for the colours that matter most.
| File type | Good for | What to check |
|---|---|---|
| AI (Adobe Illustrator) | Logos, lettering, flat graphics | Fonts converted to outlines; artwork on its own layer under the guides |
| PDF (vector) | All designs | Saved with vector content, fonts embedded or outlined |
| SVG | Logos and flat graphics | Clean paths; nothing hidden outside the panels |
| TIFF, PNG or PSD | Photos, textures, painted designs | 300 dpi at 1:1, including the bleed |
| JPG | References, or large photos at full resolution | Compression can soften fine lines |
Our help pages on artwork files and on vector files explain how to check yours. Colours are matched as closely as possible and confirmed on the mockup and sample; neon and some brand colours cannot be matched exactly. Our Pantone glossary entry explains which colour references to use.
- Hide or delete the template guide lines before you export.
- Keep white parts of the design in mind: sublimation has no white ink, so white areas show the white fabric.
- If you only have a sketch or a low-resolution logo, our design support team can usually redraw it and place it on the template for you.
Is there a free balaclava template to download?
Yes. Our free balaclava templates come as PDF and SVG at 1:1, with the panels, bleed, cut and stitch lines, safe zones, opening keep-outs and matching notches marked, for adult 1-hole, 2-hole and 3-hole styles and a kids 1-hole style. They are a guide for planning your design; the final production template is sent with your quote.
Download the free templates (guide only): all styles as a ZIP (SVG + PDF) · PDF: adult 1-hole · adult 2-hole · adult 3-hole · kids 1-hole. The ZIP also holds the SVG files with the ARTWORK, GUIDES and INFO layers.
Place your design on the artwork layer, fill every panel to the bleed line, keep logos inside the safe zones and send the file with your enquiry. For other openings, such as an open face or your own sketch, our team draws the template for you.
What happens after you send your design?
Send your artwork and we usually send a free digital mockup within 1–2 working days. Production starts only after you approve the mockup and the sample.
- We check the file, the resolution, the bleed and the safe zones, and tell you if anything needs changing.
- We send the mockup, showing your design on the panels and on the finished balaclava; see how mockup approval works.
- A sample follows: a pre-paid sample, paid 100% in advance and ready in about 5–7 days, or a free pre-production sample after the order and the 30% advance, approved by photos or video.
- Bulk production takes approximately 14 days after sample approval.
We print only designs you own or are licensed to use, so please tell us if your artwork includes a character, a club crest or another licensed mark. The full ordering steps are in our guide on how to order custom printed balaclavas.
How to choose the right template and set-up
- A goggle-friendly ski or snowboard mask: the 1-hole template with the wide eye opening.
- A masked, graphic look: the 2-hole template, with details kept clear of the nose bridge.
- Easy talking and breathing: the 3-hole template, keeping lettering away from the mouth opening.
- Festival or costume prints: a mesh eye, or a closed printed face with the eyes printed only.
- A kids range: the kids template; it fits heads of about 49–54 cm.
- A photo or painted design: 300 dpi raster files at 1:1; check the face on a worn sample.
Sending your balaclava artwork to Mr Balaclava
We make sublimated balaclavas from 50 pieces per design, with your branding; Mr Balaclava’s name never appears on your products. Catalogue sublimated balaclavas start at about $4.99–9.50 per piece at 50 pieces, depending on style, fabric and print; prices usually fall at larger quantities, and our team confirms the price for every custom order.
What to send us
- Your artwork on the template (AI, PDF, SVG or a 300 dpi file), or a sketch and references.
- The style and opening: 1-hole, 2-hole, 3-hole, open face, mesh eye or mouth, or a closed printed face.
- The fabric, or the season and feel you want.
- The quantity per design and the sizes (adult, kids).
- Labels and packaging, if you need them.
- Your deadline and the delivery country.
Frequently asked questions
What is the print area of a balaclava?
With sublimation, the print area is the whole balaclava: the front, both sides, the back, the crown and the neck band, edge to edge. Logos and text should stay inside the safe zones, away from seams and openings.
What resolution does a balaclava design need?
Raster artwork should be 300 dpi at 1:1 including the bleed, which is about 3,213 × 4,866 pixels for the adult front panel. Vector files have no resolution limit.
Can I design the front and back differently?
Yes. Each panel can carry its own design, so the front can show a face and the back a pattern or a logo. Let the background continue across the side seams so the change looks intended.
Is the free template the same as the production pattern?
No. The free templates are a guide for planning your design; the final production template for your style and size is sent with your quote, and the mockup shows your design on it.
Can you set up the template for me?
Yes. Send your logo, pattern or sketch, and our team places it on the panels and shows you the result as a free digital mockup.
See a finished design in our streetwear camo balaclava project, compare costs in what custom printed balaclavas cost, browse the sublimated balaclava catalogue, or send your design for a free mockup.